Linux? On my phone??
I've used Android for longer than I have had a phone. The first computer I owned was an Android 4 tablet[^bq]), which I received as a gift for my 8th birthday, alongside a shiny Google Mail account (huh, I guess I was breaking TOS since the beginning lol). Since then, I have fully engaged in the Android ecosystem, running relatively up-to-date OS versions on both smartphones I have owned, at least until the last one stopped receiving updates with Android 12L. I then looked into alternatives, and floated around options like GrapheneOS and AICP until I settled on the amazing @LineageOS@fosstodon.org since they kept maintaining the OLED “black” theme (thank you!!) that was removed on vanilla Android 12. Oh, and they support latest Android releases on otherwise-obsolete devices like my poor Pixel 3a. Unfortunately, all these projects are based on the Android Open Source Project (AOSP), which is developed solely by Google and thus puts them at its whim. Sound familiar? The main reason I still stick with Firefox despite the AI stuff is because it's the only remaining browser that doesn't… 100% depend on and is at the whim of Google's Chromium project.
[bq]: the tablet was made by BQ, a defunct Spanish company which, coincidentally, was the first to launch a Ubuntu Touch device: https://www.zdnet.com/article/first-ubuntu-smartphone-aquaris-e4-5-launches-into-cluttered-mobile-market/
Why I'm leaving my comfort zone
So: what's Google done this time to drive me off of Android? Maybe it's the recent lack of punctuality of AOSP source code releases, being several months late and thus preventing alternative Android distributions from staying up to date (and now as of writing this post, they will reduce the AOSP source code update frequency from quarterly to only twice per year?? this does not bode well, yikes). Maybe it's their (for now slightly less bad) attempt to require passport verification & payment to distribute apps even outside of their Play Store? Perhaps it's their repeated sabotage of open source apps' ability to function?
Yes to all, but I will blame this little green boi:
 In case you don't know (so lucky), this is a feature introduced by Google for Android 12 which helpfully pops up to tell you when a (non-Google Play Services) app accesses your location. While on the surface the location indicator is a good idea, there is no user-facing whitelist and thus the Home Assistant or weather apps, both of which are FOSS and I thus fully trust, would cause the green dot to pop up with all its animations for a few seconds, every five minutes. It literally drove me crazy, and was the last straw for me to finally consider an alternative.
The distro
Now, there's a few distributions of Linux for phones, but with my goal of moving away from Google I did not want to settle for something that still depends on Android, otherwise we'd have the Chromium problem. This means that all the distros that depend on Halium to run a Linux userspace don't qualify, despite being the most likely to have hardware working given they use the Android drivers and kernel. That leaves me basically with only one option, that being the Alpine-based postmarketOS. I got to try a device running it at last year's FrOSCon and found its performance very impressive, though I got some fair warnings about missing drivers for stuff like the fingerprint reader. I also read @neil@mastodon.neilzone.co.uk's excellent blogposts about his experience trying it on a OnePlus 6 phone. I asked around the @postmarketOS@treehouse.systems Matrix rooms, and my awesome local Aachen hackspace @CCCAC@chaos.social where I spotted someone with postmarketOS stickers on their laptop (if you're reading this, hi!), and finally settled on buying a Fairphone 5 to run pmOS on. The reason I did not install it on my existing Pixel 3a is twofold:
It has very little RAM. You can run pmOS on 3GB, but it doesn't feel very future-proof given the state of the web (also, I don't know how heavy Waydroid is)
I don't want to sacrifice my existing Android install. What if I need to do something that only works on Android (foreshadowing)? What if I delete important files while flashing pmOS?
I definitely think Mobile NixOS is worth a look for its immutability & reproducibility, which makes a lot of sense on a smartphone. They don't list my device on their Devices List, but I'm sure I could get it working like pmOS given enough tinkering. NixOS gives me this safety cushion of being able to easily rollback my entire system if something goes wrong. Meanwhile, every time I touch a system file on postmarketOS I feel like I'm committing a crime, and every update I do feels like a gamble on whether my phone will keep booting or not. For now, I'm waiting for postmarketOS Duranium to become usable, and then make a decision whether to distro-hop based on the project state, since I'll have to reinstall anyways.
Installing postmarketOS
I received my Fairphone 5 from a non-Amazon online store, skipped thru its Android setup, and directly accessed the hidden developer settings to unlock my bootloader. Fairphone, for whatever reason, has a convoluted step of inputting device data on their website to get a “Bootloader Unlocking Code”. I guess they want to track how many of their devices run unlocked… kind of uncool, as the phone's unlockability relies on them keeping this web tool up and running. I then went to follow the postmarketOS install instructions, but found there were multiple options. For example, if you want full-disk encryption (FDE), the “pre-built image” option does not provide it, and you must use the pmbootstrap CLI tool. Thankfully, the Fairphone 5 pmOS wiki page has instructions for this which I followed without issue…
…or so I thought! After the install, my phone booted showing the postmarketOS bootanimation (with Linux console output periodically eating away at the anim… looks kind-of broken but should be fixed once pmOS adopts Plymouth), asked for my FDE password, aaaand (:drums:)proceeded to get stuck on a black screen. Thankfully, I did this at CCCAC, and quickly got help troubleshooting. In the end, it turns out the “Plasma Mobile” package was broken, so I picked the other name that sounded like it'd have a usable UI: “GNOME Mobile”.
[!NOTE] This is the part where I want to be really really clear that I don't intend to create any negativity toward Linux mobile projects. I will be complaining about things quite extensively, but only because I think it is really important to highlight how the experience is as an end-user (and was asked to share it!). I have massive respect for the people that write the code that makes Linux on phones possible, and I hope to help make all this a reality. I cannot possibly be more excited about Linux Mobile right now, so much that I'm fully dedicated to using it day-to-day.
GNOME Mobile
OK, so I installed GNOME Mobile instead of just going with Phosh. I expected the UI would be somewhat similar to the Phosh screenshots I'd seen, but I was keen to explore different ways of interacting with a phone, and its name sounded more “upstream” than Phosh. GNOME is a high-quality desktop (if the defaults suit you), and in general I expect the defaults on a phone to be reasonable.
After booting and entering my FDE password, I am first greeted by the full “desktop” version of GNOME Display Manager (GDM), asking me which user I want to log in as. Once I select myself (the only option), a full QWERTY on-screen keyboard (OSK) pops up and I get to type my user password, which is supposed to be a PIN, so should just have a numberpad…
After inputting my PIN, it looks like GDM crashes to a black screen, but after a few seconds a familiar GNOME interface pops up! …and proceeds to (only sometimes) ask for my password again, twice (with different-looking modals), to unlock the GNOME Keyring. Thankfully, these two extra password prompts have gone away recently, so I can only assume the bug is fixed. There's a nice “welcome” program that explains some of the basics, and tells me it's meant for enthusiasts. Well, here I am :)

GNOME Mobile presents the usual GNOME Desktop app grid, with the ability to swipe between multiple pages. The usual quick settings tiles can be accessed by swiping down from the top, and notifications awkwardly pile up under it, with a very small scrolling area. When an app is open, the homescreen will show that window and move the search bar out of the way. It took a little getting used to, but I find that I quite like this interaction model!
The frame drops are entirely due to software encoding, normally it is snappier. Also the double Do Not Disturb button might be an extension messing with things, my bad!
What I like less is how the icons in the app grid behave…
Sometimes you can move icons, sometimes not. Making a folder is a nigh-impossible task (I must have tried a hundred times, and only succeeded three times in total). Also: perhaps I am imagining it, but sometimes I boot my phone and the icons have rearranged themselves, and other times some are just missing. I definitely lose apps every once in a while, but thankfully the search bar has my back to find them again.
When I installed the OS, there were two settings apps, one being GNOME's own Settings and the other being “postmarketOS Tweaks” which let me change some things like the hostname. The latter app has since disappeared, I think moved to the Phosh settings app in this merged MR. I have not yet looked into restoring it as I quite like the hostname I picked: hermes, messenger of the gods and himself the god of trickery, two things that represent this phone quite well.
The lockscreen is very usable. It shows a blurred version of my wallpaper, the time, and notifications I received (most without content… and no way to enable it). I can swipe up to show a PIN entry, which absolutely has to be 6 numbers. Sometimes it will eat some of the numbers I input and I have to try again but, when it works, it works well. The lockscreen does not allow poweroff or reboot. only suspend is available, which I could not figure out how to fix. Notifications on the lockscreen often say “Just now” regardless of when they were received.

Something really cool inherited from desktop GNOME is the “GNOME Online Accounts” feature, which allows signing into many different online services and integrate them to the OS. I added my self-hosted Nextcloud account and was happy to see it import everything. Tapping the date on the top-left shows my upcoming events and, when my modem is working, I can start SMS conversations in Chatty with my contacts imported from Nextcloud.

It's a little bit funny that all GTK apps seem to insist on showing me their keyboard shortcuts in menus, despite not having a keyboard attached. This makes dropdown menus much bigger than they need to be, but isn't a super big deal.

I found a couple ways to crash the shell, like closing an app while a popup or side menu is open, and apps themselves can crash when they try to do desktop things like lock the mouse cursor. However, when not doing weird stuff, the experience is pretty stable.
Hapticsn't
The first thing I noticed after interacting a little bit with the UI, is that there is zero haptic feedback. On Android, when you do certain actions such as typing or switching apps, the motor inside the phone makes a nice “buzz” as feedback. I didn't realize how much I came to rely on this until it was taken away from me. I was expecting it to work since the pmOS wiki page for my device says it works:

After asking in the GNOME Mobile Matrix room, I learned that there is a service called feedbackd, which other interfaces talk to but GNOME Mobile does not. I have to imagine then that haptics would work on Phosh or other UIs, but (this will be a recurring theme) GNOME Mobile wants to do it a different way, and thus… hasn't done it yet. I plan to work on this at some point, especially after some productive discussion with other GNOME Mobile devs, but I haven't gotten much further than asking for input from the XDG Portals folks. I aim to take the time to work on it further, especially talking with feedbackd developers, but other matters were more pressing thus far. I at least was able to verify that the vibration motor can work by talking to it directly with the kernel's force feedback API.
Auto-brightness
Normally this was going to go in the next section, but fortunately while writing this blogpost it started working! Unfortunately however, now I want it back off, and I can't find a way to remove it.
Anyways, auto-brightness is supported in GNOME upstream, but never showed up in my power settings as the article says it should. I asked for help in the Matrix room and we verified that net.hadess.SensorProxy detects and exposes my phone's light sensor, so I guess the gnome-settings-daemon was failing to pick this up. Not having auto-brightness means that I have to fumble to find the brightness bar every time I go outside, as I can't see what's on my screen otherwise. Now that it works, it adjusts extremely quickly to any small changes in ambient light, which unfortunately overrides my own settings. The toggle still isn't there, so I can't just turn it off. The biggest issue with auto-brightness, now that it's here, is that it animates this transition, which causes issues with my OLED display's driver: these manifest as brief flashes of horizontal bands of garbage pixels, or the color grading of the entire display changing, or (admittedly this one's pretty cool) the display showing several copies of GNOME in a grid, Andy Warhol-style.
Of course, while doing my final editing, auto-brightness is gone again, and I don't have to deal with the screen glitching anymore! I opened pma!4274 to track the display artifacts, so I know when I can try enabling auto brightness again :)
Smaller missing bits in the shell
Flashlight
There's no way to toggle the flashlight. I found a merge request to the shell that would add it, but with no activity on that repository in the last 8 months I'm not holding my breath for it to be merged. In the meantime I am running a GNOME Extension that adds this feature, which I had to manually install using the terminal as it does not appear to be packaged anywhere. I'll count this as the first required use of the terminal.
OLED support
GNOME Mobile ships a dark theme, but no option for a “pure black” background. Back on Android I distro hopped to LineageOS just for this feature. The GNOME “dark” theme is a light-grey which might make sense on the usual LCDs that desktops or laptops have, looks really bad on an OLED display, which most phones nowadays have. I tried researching how to theme GTK or “libadwaita” apps, since that seems to be mainly what my install came with, and only found references to a defunct app called “Gradience”. I was able to install a Flatpak of a fork that was updated slightly more recently, and navigated its desktop-only interface very awkwardly to set the background color to black. This worked for most apps thankfully, but I did not find a way to theme the actual GNOME shell, which unfortunately is still stuck as this ugly grey, and I've no idea where to begin to try fixing this on my device. There's a “User theme” extension that can apply CSS to the gnome-shell, but no indication on what the CSS would look like to fix the background color.
Qt apps functionality
I get that it's the GNOME shell, so I should be using GTK apps, but on the already limited Linux mobile app ecosystem, I need to be able to use apps written in other frameworks, even if they may look slightly different. I have two Qt apps installed at the moment: KDE Connect (integrate phone with desktop), and Kitinerary (find public transport routes). Both of them open with a blinding white background, with a very broken-looking interface. Tapping a text field does not bring up the keyboard (thankfully I can manually double-tap the gesture bar to get it). There is a window bar at the top with minimize, maximize, and close buttons. I haven't found a solution for these issues, but I did install “Kvantum” and “qt6ct” to at least change the background color. However, these apps still look & feel extremely broken and it makes me sad that my experience of their developers' hard work is ruined by the way they get shipped.
Copy & paste
It's not missing, but it might as well be, because the UI is so inconsistent and often buggy that I resort to manually typing over my crazy-long Bitwarden passwords. Though the Wayland clipboard works fine, each app seems to be expected to implement its own way to select text, copy, and paste. Libadwaita (GTK4) apps, which normally have pretty good UX, make it near-impossible to get the popup for copy/paste, and then the popup uses icons with no description, often leaving me guessing at their function (also it has a weird black outline). The “Text Editor” app has an especially tricky to use selection/popup interaction, probably on the account of allowing text input and those interactions conflicting with selection (it took me over 30s to get it to pop up for the screenshot):

On-screen keyboard customization
The default keyboard gets the job done for typing basic text, but (as far as I know) there is no option to change the keys available or how it works. On Android, I used and loved Unexpected Keyboard, which lets you type special characters via quickly “flicking” in many configurable directions from any given key. It also features a Ctrl key, which would entirely solve the copy-paste UI issue from above. It even binds a lot of desktop-like keys, like Escape, which is extremely useful when using e.g Vim for text editing. I am aware of a similar project for Linux mobile called Unfettered Keyboard, but unfortunately (I think) it cannot run on GNOME Mobile due to GNOME Mobile's keyboard being part of the shell, rather than a separate program. If I do stick with GNOME Mobile, I will probably learn to write extensions and see if I can write some sort of shim that lets you plug in other keyboard programs like Unfettered Keyboard.
Customization of the quick settings & statusbar
When I enable location support, there is a constant location icon in the statusbar reminiscent of that green dot which finally drove me off Android. The quick settings tiles also seem to randomly change what's available, such as auto-rotate appearing and disappearing between reboots, and a mysterious “Wired” connection that's always on taking up the first slot. On a big screen, I wouldn't mind as much since I have space to spare, but on a phone I need to save space by not showing useless icons, and I especially need things to stay where they are to build up any kind of muscle memory. Thankfully there is the amazing Quick Settings Tweaks shell extension that lets me hide the irrelevant toggles & icons, though it can't fix the rotation appearing and disappearing. Speaking of screen rotation…
Screen rotation
When auto-rotate is off, this really behaves like a desktop. You can go in the system settings and manually select “Portrait”, “Landscape Left”, “Landscape Right”, or “Portrait (Flipped)”, then click “Apply” and finally confirm “Keep changes”. Android did this thing where it still reads the sensor, and shows a button for a second when you physically rotate the phone which you can tap to actually do it. I always ran my Android phone like this to prevent accidental rotation, and I would love to see this on GNOME Mobile. Maybe that's a good first contribution if I decide to dive into UI stuff.
Rarely, I get lucky and an “Auto-rotate” toggle is in the quick settings. When it is enabled, rotation is instant the moment I tilt my phone. While I like the lack of animation, I do wish it were a little less sensitive as it's very easy to accidentally rotate. Thus, even in the rare event the feature is available, I keep it turned off. I think this issue is related to iio-sensor-proxy, as sometimes sudo systemctl restart iio-sensor-proxy brings it back, but other times this command gets stuck, so I am not sure.
Battery life
Normally this'd have gotten its own h2, but unfortunately the otherwise excellent battery life (which I estimate would last well over a day) gets completely trounced by two issues in (presumably) GNOME Mobile:
Since suspending on mobile is not really a thing, battery life relies on apps using as little power as possible at all times, and suspending features when not used. I'm not sure what part of the stack is responsible for this, but for example I would expect 3D rendering to not use power when the screen is off, or the camera app to suspend the camera hardware when unfocused. This is not the case right now, and for example I have had my phone die while going out because I forgot to swipe away the “Camera” app window, which caused it to stay on for several hours until the battery gave up. I'd love to learn more about this!
The
gnome-shellprocess will randomly start consuming 100% of one CPU core, and not stop until restarted. I have to constantly feel my phone in my pocket in case it starts getting warm, and if so log out & back into the shell to prevent it eating the entire battery life. This is tracked by this issue, and two weeks ago I spent quite some time trying to figure out the root cause and collecting profiler data. Unfortunately I don't see a fix on the horizon, and if it keeps happening I might have to switch off of GNOME Mobile entirely.
Of note: my phone came with “suspend” enabled, which until recently would cause a kernel panic (I was quite confused why pressing the off button would cause a reboot!), so I disabled it in the GNOME Settings. Suspend is now fixed, but I don't think I can use it as it prevents all network-based apps from receiving notifications. Supposedly SMS & calls can still wakeup the device, but 95% of my communications go thru Matrix, and the remaining 5% are Signal, neither of which work while suspended.
Something strange I encountered is that the phone will not charge over a USB-A cable. On Android it would charge slowly, so I could leave the phone plugged into my desktop's USB port while developing apps and test on it, however postmarketOS requires having the phone plugged into a proper C-to-C cable connected to a USB-C power delivery capable power supply. The phone will also always show a notification prompt asking whether I want to transfer files via MTP (but doesn't actually do anything), “developer” (what?), or just charge, even if the cable is power-only.
I usually leave my phone charging next to my bed, and most of the time this works, however sometimes I will find the phone really hot and displaying the full-disk encryption password prompt, which I guess means it kernel panicked. This also happened a few times in my pocket, and the password prompt keeping the screen on likely contributed to quite some power loss.
Ok but what about the phone stuff
Yes yes, I'm getting there. I just have a lot to say about it even before inserting a SIM card!
The Fairphone 5 requires removing the battery to access the SIM slot, which at least they make very easy, but does force me to reboot to switch SIMs. These days I only use one though, so it shouldn't be a problem. pmOS detected my SIM and it showed up as “Mobile Network” in the Settings app, with the usual toggles expected from other OSes. I had to manually select the correct Access Point Name (APN) for my French cell operator, which I have experience with as I had to do the same on LineageOS (which actually was harder than on pmOS, since Lineage had me manually input all the settings!). Once that was set up, I saw for the first time a nice 5G icon in my statusbar, indicating mobile data works! It's also the first time I get to use the 5G I pay for, since my previous phone only supported 4G.

I can't seem to change the “Network Mode” option from its default setting of preferring 4G to one that prefers 5G: it lets me select it, but doesn't apply and shows me a popup that says Failed: reloaded modes (allowed '2g,... (and trails off). I can probably find out more by using journalctl, but it has not bothered me enough to do so.
What HAS bothered me is mobile data randomly becoming unavailable. One time it was caused by an update (that's what I get for running postmarketOS “edge”), which I reported and it got fixed in record time. Other times however it seems to happen quite randomly, like the auto-rotation disappearing (though less often thankfully!). This is usually remedied by a reboot, but is quite annoying. I'd expect a notification saying my network connection failed, and I do get these, but only when I leave the range of a wifi network (which is very common given I carry the phone around!) and some other random times it decides to send this, not when mobile data disappears.
Socials
The primary reason for carrying my phone around is being reachable, and reaching people when needed.
SMS
The install came with this very nice app simply called “Chats” (but the process name reveals it is actually Chatty) which allows me to send & receive SMS. It claims to support MMS, but it fails when I try to send one. The app also (!!!) let me log into my Matrix account and read messages in unencrypted rooms, sadly this last bit is not useful to me as most of my communications are encrypted. If you don't encrypt your messages however, like in SMS, this is an awesome app that runs well and does what it says. I did have some trouble sending SMS to new numbers, one of my family members did not receive a rather time-sensitive message, but I was having some similar-ish troubles on my Android phone so it might be a carrier thing.

Matrix
On the Matrix side, I first tried Fractal to have the GTK experience, however it unfortunately seems to run into similar crashing & freezing issues as what I reported when I tried Fractal on desktop. Thankfully I was delighted to see that the Matrix client I used on Android is packaged on Flathub! FluffyChat runs great and basic messaging worked without any issues.

There's what is likely a packaging bug that prevents it from loading an emoji font, so I can't see most emojis. There's a permanent bar at the top of the app that just says “FluffyChat”, and I think is the GTK app trying to draw client-side decorations (probably GNOME Mobile should tell apps to, uh, not do that). Unfortunately, the Flutter code behaves like the desktop version, and lacks several rather important features. A non-exhaustive list:
- can't play or record voice messages, have to manually download them then open in an audio player
- can't play videos, same deal
- no option to take a photo to send
- no notifications while the app is closed
- notifications for the room you're looking at get filtered even if the screen is locked or the app window is unfocused
- it makes every picture I send *extremely green* (flipping endianness I think):

I have fixed audio in a merge request, and I think video should be fairly simple to enable as well. I fear that taking photos will require some new XDG portal, so I'll be leaving that one for last. The notifications issue requires a UnifiedPush integration, which the Flutter package supports, but needs some work. I have a test version working on my desktop, but it is lacking a lot of logic for how to handle them. I hope they are merged quickly though, as I don't want to have to start to rebase a bunch of branches in a fork…
Signal
Signal is what I give to people who don't want to invest an hour in picking a Matrix server, client, figuring out encryption, and then not saving their recovery key. This means some of my extended family and contacts from work. Thankfully there is a Signal client for mobile Linux called Flare which can send and receive messages including images (though it strips EXIF metadata, which means some photos get sent sideways or upside-down). It can't handle calling, but I usually make Signal calls on my desktop anyways, so it's not a big deal.

Fediverse
I use Mastodon to access the Fediverse, and was very happy to discover @Tuba@floss.social. It implements basically everything I could want out of a Mastodon client, and looks pretty good while doing so. Just missing an OLED background, but I'm pretty sure that's on me for making such a messy GTK theme. I'd like to fix the background color at some point, though.

Sadly, Tuba frequently triggers some bug in the Vulkan driver that causes it to print “LOST_DEVICE”, and the app gets totally frozen midway through sliding a view out. I don't know where to report this, but it means I can't navigate the Fediverse for very long before I get stopped in my tracks. Another freeze which might be related occurs when I write a too-long post or attach a picture, it probably triggers some re-layout that hits a GPU bug and freezes. I unfortunately have lost several surely-banger-posts to this specific freeze. It also suffers from quite poor scrolling performance sometimes, potentially related to running out of Vulkan memory (I see that log message a lot).
I installed Thunderbird, which brought along an extension called mobile-config-thunderbird, and promises to make the UI more usable on phones. Unfortunately, something goes terribly wrong and it doesn't render my inbox at all, so it's not particularly useful as an email client right now. It does send me notifications though (as long as the app window is open!!!), so at least I can tap on one to read the email, since that does render.

On the topic of notifications
Yeah, it's quite important to be able to see when one of these apps wants my attention! Thankfully everything I'm running is FOSS, so there's no dark patterns to worry about here.
Push notifications
I'm not super qualified to explain this, but my surface-level understanding is that on both Android and iOS, there is a central server that the OS stays permanently connected to, and services you have apps for can “push” to that server, which then tells the OS to wake up the app so it can show you its notification. This heavily reduces power usage, and saves each app from implementing its own background service. On Android, this is implemented through Google Firebase Cloud Messaging, but thankfully an alternative exists in the form of UnifiedPush, which let me self-host my own push server that supporting services (Matrix and Mastodon, in my case) could use instead. This meant that Android apps like FluffyChat and Tusky didn't have to run in the background, but still showed me reliable notifications piped through my very own server, which my phone was always connected to.
On postmarketOS, I was very pleased to find a UnifiedPush wiki page, but was a little worried to see only a KDE-specific implementation, with just a single app listed as supported. Thankfully I was able to install kunifiedpush on GNOME Mobile and write a config file to make it connect to my self-hosted Ntfy server. It was all a little manual (and required terminal usage #2, probably due to me running it outside of its native KDE), but it means apps can now register to it and it actually delivers notifications, nice! I am able to receive notifications from the Fediverse via Tuba, which supports UnifiedPush, and as stated earlier I began work on FluffyChat support for UnifiedPush on its Linux builds.
Flare (Signal client) has an optional background service that keeps a connection to their servers, which is unfortunately required as Signal does not support UnifiedPush. SMS works fine as well.
Actually seeing the notifications
Man, I really really hoped this would work! Unfortunately I have some experience with upstream GNOME not really showing me all notifications, so I should have expected this. Even for apps that do consistently send notifications for messages, like FluffyChat and Flare, I will usually only see the first notification in a conversation, subsequent messages get “grouped” (which is a nice feature UI-side! but) which means I get no sound or pop-up for subsequent messages. GNOME also doesn't show me any notifications while fullscreen which, while I can understand the rationale, is not how I want it to work. This means that if I am watching a video fullscreen, I won't find out that my cooking timer has gone off until the video ends and I exit fullscreen!
Oftentimes “old” notifications get stuck, and also display wrong times. This happens with FluffyChat notifications quite frequently, where I open my phone and it says I received a message from my dad “Just now” or claims it came recently, when I actually had a full conversation hours ago.
Additionally, as explained earlier when talking about the lockscreen, it by default doesn't show the notification content for privacy reasons. I can enable showing content per-app in the GNOME settings, which would be great except it does not show every app, especially FluffyChat which is the one I actually need to be able to read quickly.
Pebble
Thankfully, I wear a Pebble smartwatch, and an amazing developer who goes by Muhammad maintains a Pebble connector app that can buzz my watch when I get a message (even when GNOME unwisely decides to hide the notification), like my watch used to do back on Android! Rockwork is an unofficial Pebble client for Ubuntu Touch, and with some work I was able to rebase an experimental non-Ubuntu-Touch backend for it written by Xela Geo. I abstracted some of the buildsystem further to make it usable as an Alpine package, and have been happily running Rockwork on my postmarketOS phone, with almost everything working. I opened a merge request to upstream, and if/once it is merged I hope to contribute my first package to Alpine.

I can control my music and read notifications on the watch, while opening RockWork lets me switch watchfaces and view historical step counter & sleep data. I cannot exaggerate how awesome this is. Of course though, it's not all perfect, though most of it can probably be blamed on my porting work (the app seems to work fine on its native Ubuntu Touch platform). I still need to get the app store and calendar sync to work, and there's a big problem with some apps using the XDG portal Notifications API, which GNOME implements privately and thus Rockwork can't eavesdrop on to forward to the watch. I don't know how I will solve this last one, and it currently means I don't get any SMS notifications.
Using the camera
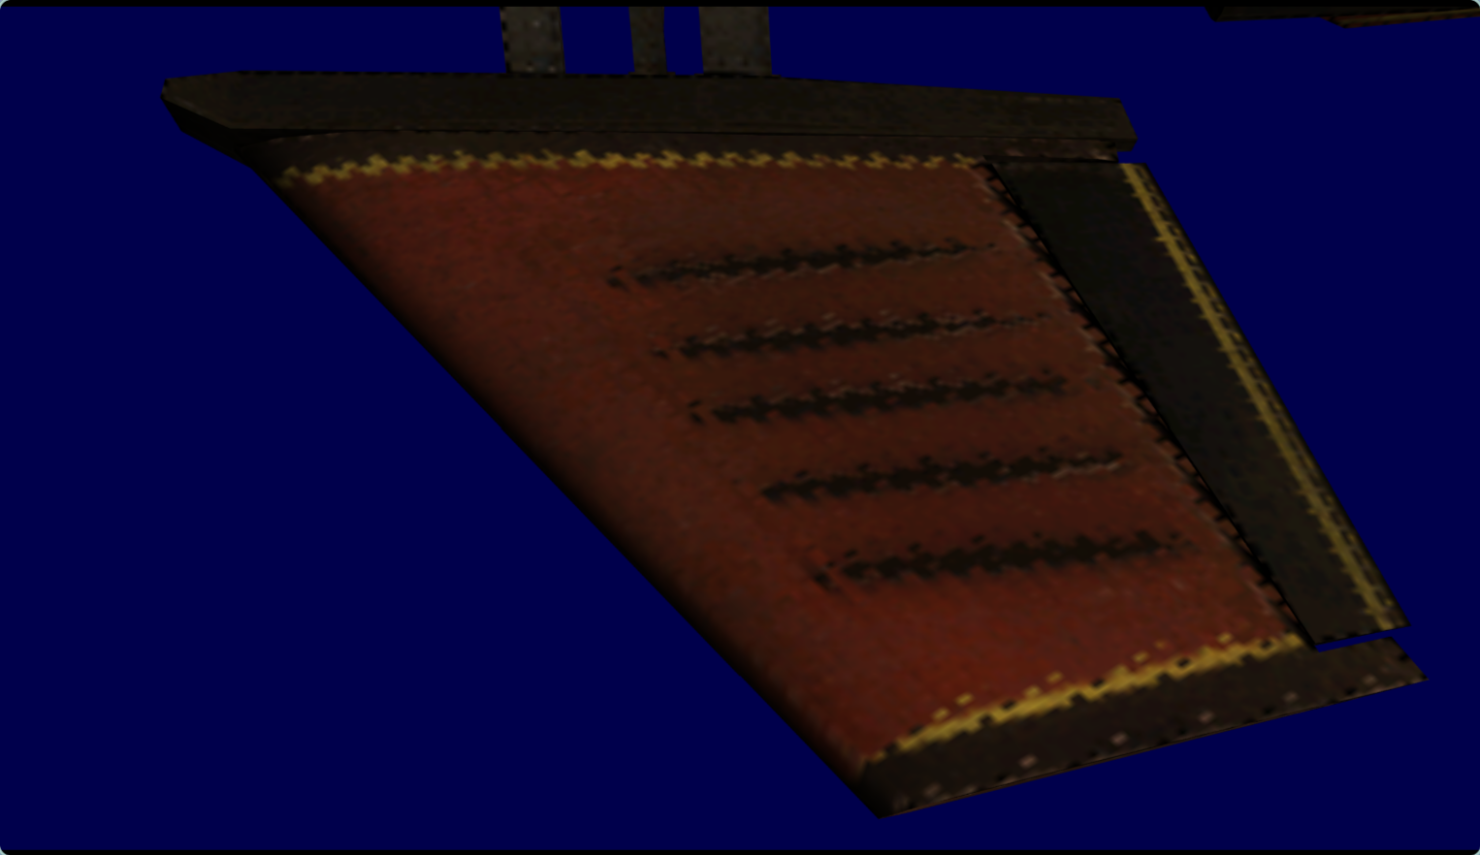
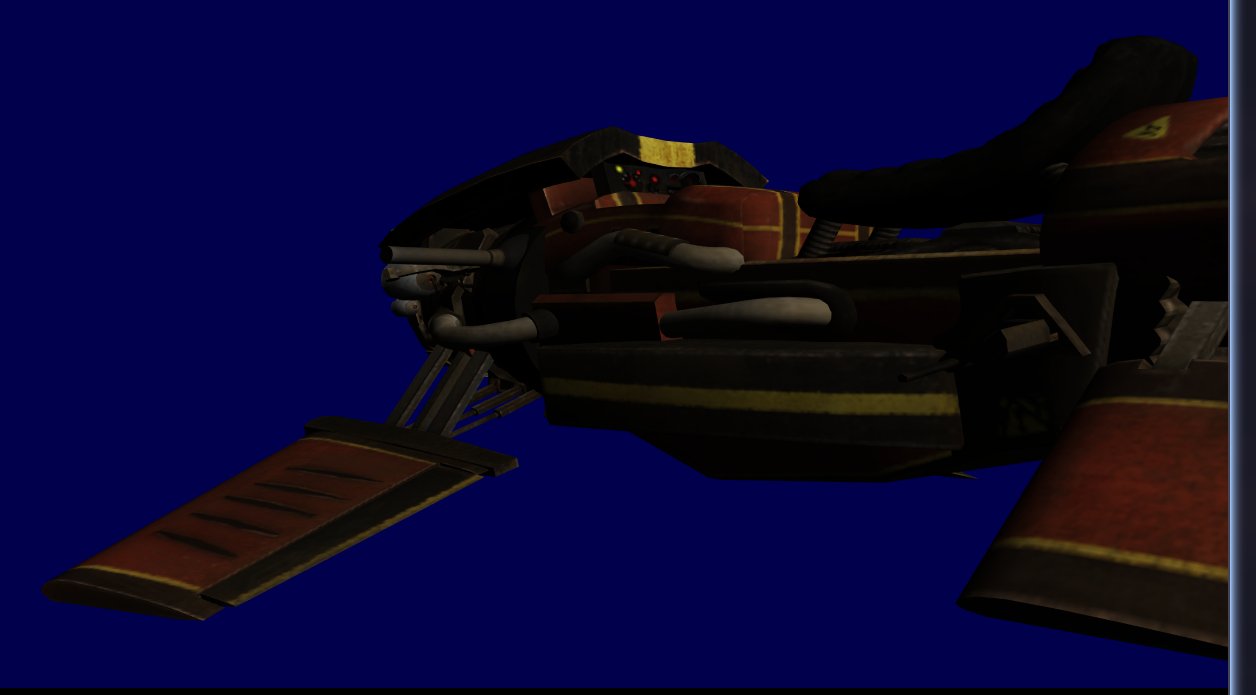
One of the things that made me pick the Fairphone 5 over other similar devices is the “Partial” status of the Camera (rather than “Broken”). When I got the phone, I was excited to try out the camera, as I usually take lots of pictures of my cat different places I go. I didn't expect much given the rating, but I am mostly positively impressed at how well it works given the level of support. Using the built-in “Snapshot” camera app (which is the only one I got working), there is no way to change the focus or the zoom level, but you can take pictures and videos, as well as scan QR codes. The focus appears to be stuck at a fixed setting and does not auto-adjust. Only the wide-angle rear camera or the front selfie cam are supported by postmarketOS at the moment, probably due to a missing driver for the normal one. They both seem to have similar picture quality, so I won't test them separately (but all the pictures shown are taken with the wide-angle). By default, pictures are very dark and green-tinted, especially indoors. However, if I cover the sensor with my hand (or point the camera at a bright light) for a bit, then when I uncover it the colors will briefly be a bit brighter and less green and I can take my picture, which ends up a lot better (but still dark):

It doesn't deal well with shooting when a light is in shot, as it seems to get overexposed.

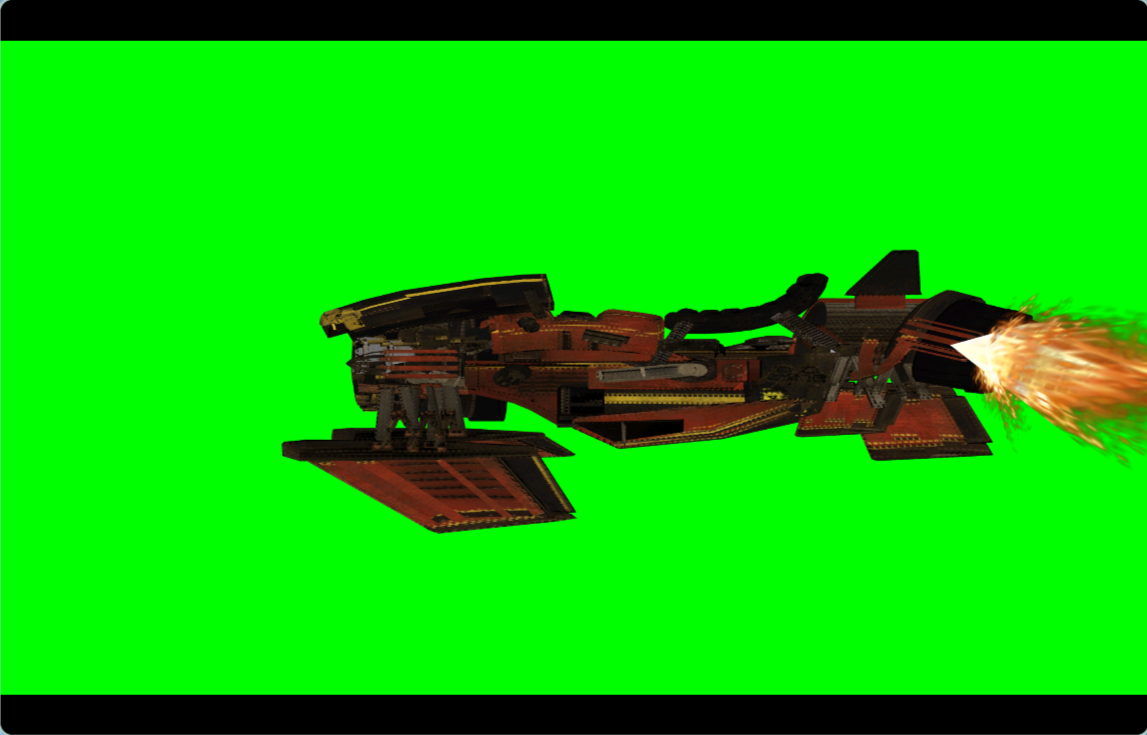
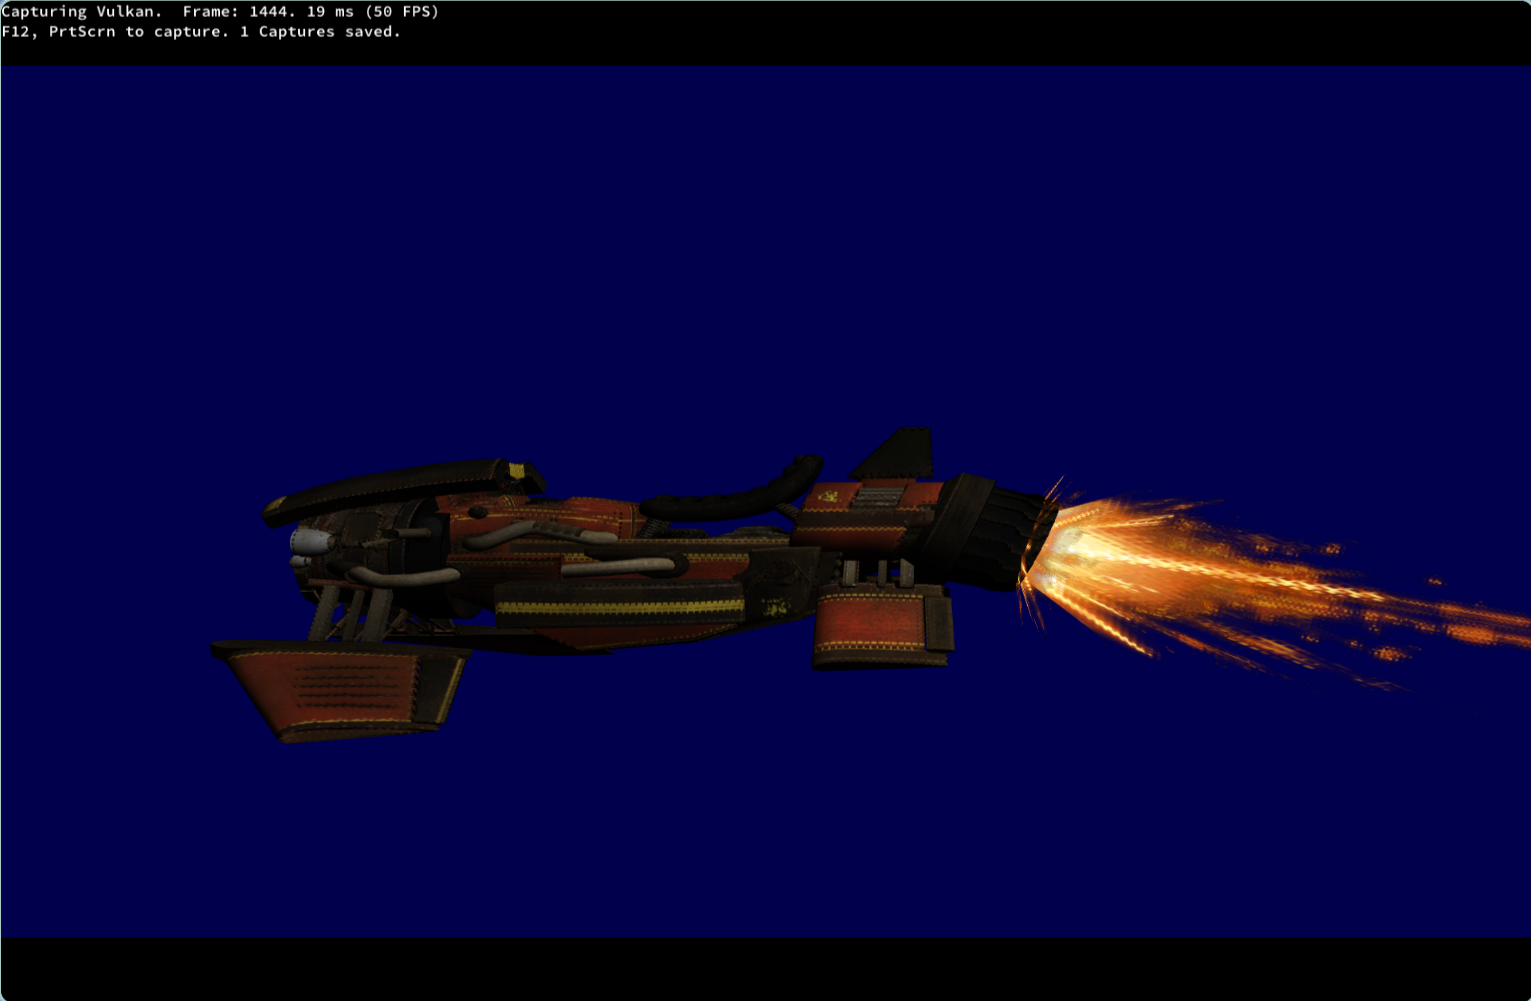
Trying to take a video used to freeze the phone for a few seconds, then reboot it (kernel panic?), however as of last week it no longer does this, though recording is extremely laggy. I don't know, but I think the GPU drivers might not (yet?) support hardware video encoding or decoding (except the wiki says it does, assuming it is “Venus”), so the result is not very usable yet. Here's a recording of where I'm writing this blogpost (I promise my lights are on):
The camera app allows viewing recent photos & videos, but no way to zoom into them or rotate media after-the-fact. There is also no standalone gallery app I could find, so viewing media is unfortunately quite awkward. Maybe once I finally set up Immich, the website can stand in for a gallery app.
Either way, once I find a way around the FluffyChat image endianness bug, I will feel quite happy sending some of these pictures to family & friends.
Audio
Oh, yeah, I haven't talked about this one yet. The pmOS wiki page lists Audio as “Broken” for my device, and indeed this was the case when I first installed pmOS. However, I saw that a lot of work was being done in this area and felt that I could trust these amazing folks to get it working. My PineBuds (bluetooth earbuds) paired fine and allowed me to listen to a couple YouTube videos in the meantime. Lo and behold, a few weeks into daily driving this phone I got to start enjoying the speakers on my Fairphone 5 via pma!7700, which I installed on my device thanks to Mr. Test. As I'm writing this, the MR is now merged and should be built soon!
![NOTE] It's called
mrtest, a tool for testing Merge Requests, but I keep reading it like Mister Test and so I will make you read it that way at least once >:)
The speakers don't sound quite right, and sometimes go wonky until I do a suspend-resume cycle, but it's already extremely impressive work by everyone involved. It was very exciting to follow the discussion and see the first few demos from the devs, featuring classics like Rick Astley singing his one and only hit single through the speakers. I'm told microphone support is coming soon, which will allow me to start doing VoIP calls like Jitsi or MatrixRTC with friends!
Calls
Note how I specified VoIP… yeah, calls are their own thing. Even with speaker & mic working, more work will need to be done for call audio (which is a separate issue because of weird modem reasons). I can confirm that making phone calls works, as in, I can make someone's phone buzz, and they can make my phone (not buzz because GNOME doesn't implement haptics but) show a call notification—if nothing is fullscreen of course—that I can use to pick up.
I believe there is some extra complexity in Germany with VoLTE support being required, but I'll find out for sure once the call audio stuff is in place. Let's just hope I don't need to take any important calls anytime soon!
Web browsing
I only tried Firefox, as it was installed by default on my phone (with the mobile-config-firefox configuration by default).
Interface
The UI in portrait mode is reminiscent of Firefox for Android with the URL bar at the bottom, except tabs are always displayed. I would like for the tabs to auto-hide or, even better, browse them in a grid like the Android version provides, but this is perfectly usable. A right-click action can be simulated by long-tapping, which will also select the word you long-pressed. If you tap on the word again, the right-click menu closes and you can drag selection handles to select more/less text, then long-tap again to act on it.

In landscape mode, the UI moves to the top of the window and permanently takes up about one-third of the screen, given both the URL bar and the tabs are always visible and neither can be collapsed. This makes the landscape mode functionally useless, as there is not enough space to interact with page content. The only time I use it is when I want to fullscreen a video, which thankfully can be easily done by double-tapping on the media. The “popout player” is also activatable, though unfortunately GNOME Mobile does not allow floating windows to overlay other apps, so it's not useful like it is on desktop.

The HTML <select> tag (used for dropdown selections) works exactly like on desktop, with very small touch targets, and is not scrollable, making only a few entries near the top of the list selectable.
When interacting with the popup menus that appear when one of the many permanently-visible buttons at the bottom bar, I found that there is no intuitive way to close them. Tapping outside of the menu does nothing, and clicking the button that opened it simply flickers it off-then-back-on. Thankfully, I found that by tapping the URL bar, it pops up the OSK, which I can then dismiss to get back to the page. This is quite awkward to do, but lets me use most of the browser features.
Extensions
This being the full version of Firefox, all extensions are available to install, and I was really happy to get my favorites uBlock Origin, Dark Reader, LibRedirect+Indie Wiki Buddy, Stylus, and Constent-O-Matic synced from my Firefox Account. I set Dark Reader to force every page to use an OLED-black background, set up my AI-blocking stuff on Stylus, and configured LibRedirect to point to my favorite frontends for websites I do not wish to send traffic to. I did have to make sure to disable settings sync in the Dark Reader preferences, as otherwise the OLED preference got automatically copied to all my desktops!
Unfortunately extensions suffer from the same “popup menu” behavior described in the previous section, and have the extra issue of only part of the menu being rendered (however, the entire menu is interactive, so if you know your way around you can still blindly navigate):

Thankfully, the Bitwarden extension has a “pop out” mode that puts it in its own window (and that window does get fully rendered!). The button to trigger this is always in the same spot, so I can reliably blindly tap it. However, the popout window replaces Firefox in GNOME Mobile, so if I have Bitwarden open I cannot see Firefox. It also triggers the app overview a couple seconds after opening, which is probably a GNOME Mobile bug, which often interrupts me typing my master password and causes me to accidentally launch whatever app appeared where the OSK key I was aiming for was. There is a native Bitwarden client called BitRitter, but the last commit was over a year ago so I fear it may suffer a similar fate to Goldwarden. There is also to my knowledge no system-wide “autofill” API for Linux, that would allow a password manager to fill login details into non-web apps.
Surfing the web
Websites themselves render and feel great as despite this technically being “Firefox Desktop”, meaning they are correctly detecting by other means that this is a phone. I did get locked out of Google.com (something about my browser being unsupported), but it served as a good slap on the wrist, reminding me to instead use an alternative frontend to Google Search, such as Startpage. I checked again while writing and it seems they now “support” my browser. I read news articles, browsed blogs, and used Piped to access YouTube videos without too many issues. It seems that Firefox does not unload tabs very readily as a few times my phone ran out of RAM, and the entire browser got killed by the OOM daemon, so I've been careful to keep my tab count low.
Terminal
Of course, we can't talk about a Linux distro without mentioning the terminal. My GNOME Mobile install came with a terminal emulator it calls “Console”, but I was able to determine by inspecting the running processes it is actually kgx (I see this project explicitly bans LLM contributions, and I applaud that!). The interface is well-adapted to my display, and has a nice feature that shows you a preview of all your open sessions/tabs in a grid. When using the terminal, the OSK gains some extra buttons for Tab, Ctrl, Alt, and the arrow keys.
The default shell is Alpine's own default ash, with no colored prompt, tab completion, or some features I am used to like this s{imple,yntax} from Bash, the latter of which I especially miss when having to type commands via a touchscreen and every saved keystroke counts. Although fish is available on the Alpine repos, kgx offers no way I could find to launch fish instead of ash. I don't want to set my system default shell to fish as it's not POSIX-compliant, and would much prefer to only have interactive sessions (kgx and possibly ssh) launch with it.
Although the interface adapts well to mobile, it does not have any mobile-specific features which would be very welcome, mainly:
Ability to select & copy text. It's very much mouse controls here, you can double-tap to select a word and triple-tap to select a line, but no way to grow/shrink the selection. When I am asked to share log output, I have to triple-tap each line, use the OSK to hit Ctrl+Shift+C (which is only possible thanks to the extra keys that appear), and one-by-one paste them into FluffyChat.
Following the system theme, or allowing a custom theme to be set. An off-grey is used as the background color instead of my configured pure-black background, which is important on OLED displays. The only setting I could find is a toggle in the hamburger menu for switching between light and dark mode. There is an open issue for custom color themes, with a linked merge request which sadly has had no response from the maintainer since four years ago when a change was requested, which has long since been implemented. I really hope it moves forward…
Pinch-to-resize. This one's more of a nitpick, but I run into it quite often so I'm putting it here. Termux did this on Android, and it meant that any TUI app that wanted more space could be very quickly and easily dialed in. On kgx, I have to use the hamburger menu to access a + and – button, and it only allows going down to half of the default size, which is not always enough to display e.g
btop.
Other than that though, it serves its purpose in a crutch (mostly restarting iio-sensor-proxy every once in a while) and with a couple small-ish changes I'd be very happy to use it.
Some other apps worth mentioning
GNOME Software is an app store that comes with the install and helped me discover a lot of awesome mobile-friendly apps from Flathub. I also believe there is a bunch of software on aports+pmaports, but sadly it is not at all discoverable via GUI, you have to use the terminal and already know the package name. This is the case of polycule for example, a very functional Matrix client built using the same SDK as FluffyChat, which I tried out but could not get the UI working very well on GNOME Mobile. GNOME Software does seem to have some support for Alpine packages as it notifies me every day about “System Updates” (despite having explicitly configured it to NOT check updates automatically) which when tapped list some Alpine packages. However, when I accept these updates, it doesn't always finish, and even if it does, running sudo apk update && sudo apk upgrade in a terminal gets even more updates. So: terminal requirement #3 is for updating the system. Flatpak updates work fine, however. I did notice that after installing updates it will show a message saying “Last checked: X days ago”, so I don't know where it gets these from.

KDE Connect is installable and, after manually enabling the firewall rules with the terminal (required use #4), was able to connect to my desktops. This lets me use a keyboard & mouse without plugging them in, control media, and do a few other things, though I did not get the file sending feature to work. The theme looks really bad because my Qt themes are broken as discussed earlier.

My favorite desktop calculator, called Qalculate! (yes with the exclamation mark!), is available but not mobile-friendly, however it can be made usable by navigating to File→Minimal window, and all the crazy unit conversions and math features are there. It does hide the history though, so I guess a mobile-native client/mode would still make sense.

There's a YouTube client with quite nice UI called Pipeline (fka. Tubefeeder), but I only got it to play a video once. It uses something called “Clapper enhancements” to play YouTube videos, and this doesn't seem to pull an up-to-date version of yt-dlp, as I get error messages about formats missing. I also tried the Flatpak, but that one complains about missing video decoding codecs on my phone, so it does not bode well. Something nice about Tubefeeder is it lets me select a Piped instance, but I did not yet find a way to have it sync my subscriptions like LibreTube does on Android. It also suffers from a quite similar freezing bug to Tuba, so I assume they both trigger the same Vulkan “lost device” codepath.

I used an RSS reader called Pulp for a bit until I touched a setting that makes it crash on startup. I'm now using Newsflash, which nicely syncs from my Nextcloud News, but only displays the article content in a narrow centered column that does not follow my libadwaita theme, so I don't use it very often. I opened an issue to track this.

Android apps
As much as I'd like to use Linux exclusively, there are some cases where being able to fall back to Android is very useful. This is where Waydroid comes in, running an entire LineageOS image with optional Google Play Services inside a container. I installed it from GNOME Software, selected my desired Android image in a dialog it presented me, and (after debugging a lot in the terminal due to silent crashing, but I don't remember what it was so I don't have a cool story to share sadly) I now have a working Android system I can boot into!
Besides the Waydroid app itself which contains the Android interface in a window, there's the really cool feature of running Android apps as their own windows. This means that, once Waydroid has booted, the apps really are quite seamlessly integrated into my shell! They have their own launcher icons, native windows, and can be closed by swiping them away. I can even use Android's back gesture (only for Waydroid apps), if I enable it inside Android's own settings app! There is noticeable input lag when interacting with these apps, which is a shame, but not a dealbreaker for me as they are only fallbacks.
I was very excited to run some of the apps I really miss from Android, and can happily report Öffi from F-Droid works great for public transport planning. I also tried to install the excellent OpenStreetMap client CoMaps (community fork of Organic Maps), which ran great, but I discovered that GPS is not bridged to Waydroid, so it's not actually able to give me directions to places. There's an issue tracking this in the Waydroid repository and some workarounds shared via a debugging “mock GPS” feature, but I didn't manage to get any working, and I would much rather have this as a hardware bridge that the Android system sees as physical hardware, much like how network is bridged through a fake wired connection.
I also tried to get my bank app running, as it is one of the only two things still tethering me to my old Android phone. The bank app is required to sign into the bank website from a new device, and to do sensitive operations like sending money to an account, so I unfortunately cannot “just use the website.” The app allows signing into it in two ways:
Taking a photo of my ID and doing a “live selfie.” This is where I discovered Waydroid does not bridge the camera, so that was a dead end.
Proving physical proximity to my old phone, and accepting prompts on the logged in app there. This is where I discovered Waydroid does not bridge Bluetooth devices.
So, I won't be getting rid of my old phone just yet. I have to charge it every few weeks when a bank thing pops up, and I guess Signal will bother me about my “Primary Device” eventually as well (the Android app is on my old phone, though Flare seems to have experimental support for being the primary device, I do not yet fully trust it to not lose my data and likely won't use it until it's considered stable). Thankfully these are rather rare occasions, and I can somewhat safely only carry around my postmarketOS phone!
There's an alternative project to Waydroid called Android Translation Layer which takes the WINE approach of “natively” running programs made for other OSes, foregoing the container approach entirely. In theory, this should let apps integrate even better, and potentially even pass the hardware to the apps that Waydroid so sorely lacks. There's a super impressive NewPipe port on Flathub using this. Unfortunately, I was unsuccessful in using the binary to run any of the apps that their own compatibility list says are supported, which I guess is likely a packaging issue on pmOS's side. I'm keeping my eye on this project though!
Conclusion
Despite me complaining so much (sorry!), I am extremely impressed with the state of Linux on mobile, and every doubt I had that I would regret moving to it is mostly erased. Most of the problems I list are minor papercuts and should be relatively easy to solve. They should make for easy targets when any of them annoys me enough that, instead of writing about it, I actually set up a dev environment and try fixing it. The community has been incredible, responding to all sorts of questions and often helping me live-debug issues with whatever crazy thing I'm trying to get working. I especially want to re-shout-out the folks at CCCAC without whom I don't think I would have taken the plunge and actually spent nearly 500€ on a device exclusively to run their software.
This blog has been dormant for a while, but with my recent adventures I am sure I will have plenty to write about, so perhaps expect some more writings once I land my first contribution to the OS!
While Android is “free,” we all pay for its development by submitting control (and data) to Google, further strengthening its control over half of the mobile OS duopoly. Since I stopped paying Google, I have now set up a recurring monthly donation to the postmarketOS team, and will look into supporting individual projects that I use every day on my phone to ensure development can continue and the amazing volunteers keeping this dream alive are remunerated for their efforts. A huge THANK YOU to everyone involved in #LinuxMobile for making the computer in my pocket possible!
No LLM was used to write this. As always, feel free to direct any corrections or feedback to my fediverse account @mat@allpurposem.at.
Thanks for reading! Feel free to contact me if you have any suggestions or comments. Find me on Mastodon and Matrix.
You can follow the blog through:
– ActivityPub by inputting @mat@blog.allpurposem.at
– RSS/Atom: Copy this link into your reader: https://blog.allpurposem.at
My website: https://allpurposem.at

 >
>